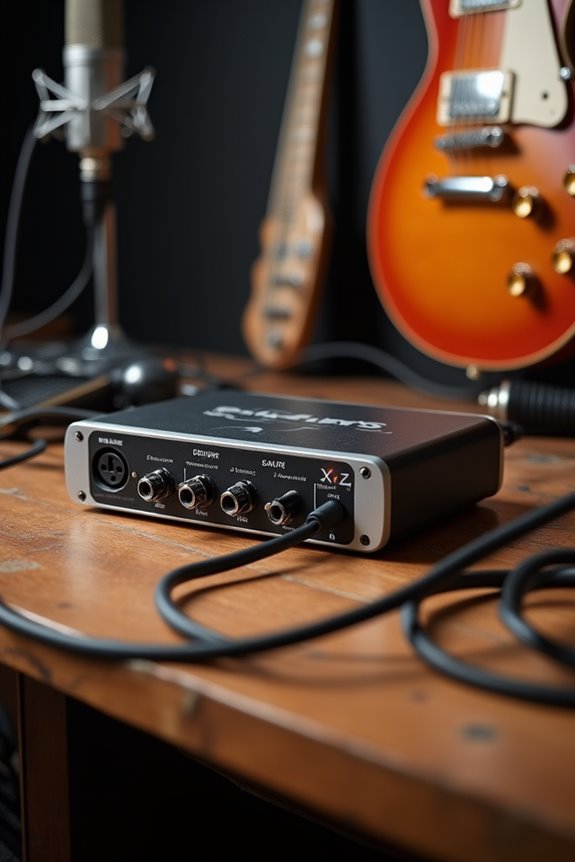
To connect instruments to audio interfaces, we first identify the input type: we’ve got instrument inputs for guitars using TS 1/4-inch cables, and line inputs for studio gear with TRS or XLR connectors. Next, adjust those gain levels to avoid clipping, and don’t forget steady monitoring! Keep an eye on cable quality; gold-plated connections and shielding matter. With some organization and practice, you can rock that setup! Let’s dive deeper into the specifics! 🎶
Key Takeaways
- Use 1/4-inch TS cables to connect electric guitars and instruments to high-impedance instrument inputs on the audio interface.
- Connect line-level devices using 1/4-inch TRS cables to the line inputs, ensuring combo jacks are set to “line” mode.
- For microphones, use XLR cables to connect dynamic mics to the interface; adjust gain levels to prevent clipping.
- Ensure proper power supply to USB-connected devices and update drivers regularly to avoid connectivity issues.
- Utilize direct monitoring features on the interface to reduce latency during recordings.
Understanding Input Types on Audio Interfaces
You may be interested


When it comes to connecting instruments to audio interfaces, understanding input types is key to capturing the best sound. 🎸 There are fundamentally three main input types you’ll encounter: instrument, line, and digital/MIDI inputs.
Instrument Inputs are designed for high-impedance signals from electric guitars or basses. They usually employ TS 1/4-inch connectors that guarantee proper impedance matching, preserving your signal integrity.
Line Inputs accept studio-level signals from gear like synthesizers and mixers, using balanced TRS or XLR connectors.
Lastly, Digital/MIDI Inputs connect keyboards and controllers.
Choosing the right input type can mean the difference between a clear tone and a muddied mess! Additionally, ensuring you have balanced outputs can significantly reduce noise interference, which is crucial for achieving that fantastic sound! So, let’s keep those cables crossed in the right places for a fantastic sound!
Connecting Microphones to Audio Interfaces
Connecting microphones to audio interfaces can seem intimidating at first, but it’s easier than you might think! 🎤 Whether you’re setting up for a podcast or recording music, knowing how to make the right connections guarantees you capture crystal-clear audio.
Let’s start with microphone types: we have dynamic mics, which don’t need external power, and condenser mics that require phantom power. You’ll usually connect them to the interface using XLR cables, ensuring all connections are secure! If you’re using a USB microphone, you’ll connect it directly to your computer, skipping the interface.
Don’t forget to adjust the gain levels for ideal recording, keeping an eye on those meters to avoid clipping. Additionally, using high-quality XLR microphones can significantly enhance your recording experience and sound clarity. Let’s get capturing!
Recommended Products

DIGIC X PROCESSOR WITH 8K VIDEO: Offers outstanding definition and realism with 16x the resolution of FHD video and an ISO range of 100-51200 (expandable to 102400) for crisp and vibrant photos and movie-theater-quality videos at up to 8K/60P

For Recording Studios and Touring

DuoPre XLR Microphone preamps, including 48V Phantom power for condenser microphones and up to 69dB of gain. Each preamp uses two gain stages to provide a full and accurate sound across the entire gain range with enough power for even the most gain hungry mics.
Connecting Electric Guitars and Other Instruments
Getting your electric guitar or other instruments connected to an audio interface can really amplify your recording experience! 🎸 While the process might feel a bit challenging at first, we’re here to break it down step by step.
Start with a 1/4-inch TS instrument cable, plugging your guitar into the interface’s instrument input. Make sure it has a dedicated instrument or Hi-Z input for peak performance. Once connected, set your gain levels carefully—too high, and you’ll clip!
Next, connect studio headphones for monitoring, avoiding computer speakers to dodge latency issues. 🎧 Remember, these interfaces handle signal processing far better than built-in soundcards, giving you great guitar effects and cleaner audio. Additionally, using interfaces with low latency performance can enhance your tracking experience, allowing for real-time monitoring without delays. Let’s get jamming!
Recommended Products

120-Watt bi-amp acoustic combo amplifier with harmony function to create smooth vocal harmonies (Boss Acoustic Singer Pro)

Product 1: Warm and rich analog soundsCrytal clear digital timbresVocoder and effectsEasy programming

Bring Your Sound to Life - Expand the sonic possibilities in your studio with the powerful semi-modular analog spectral processor that creates lively drones and colorful tonal sweeps on its own
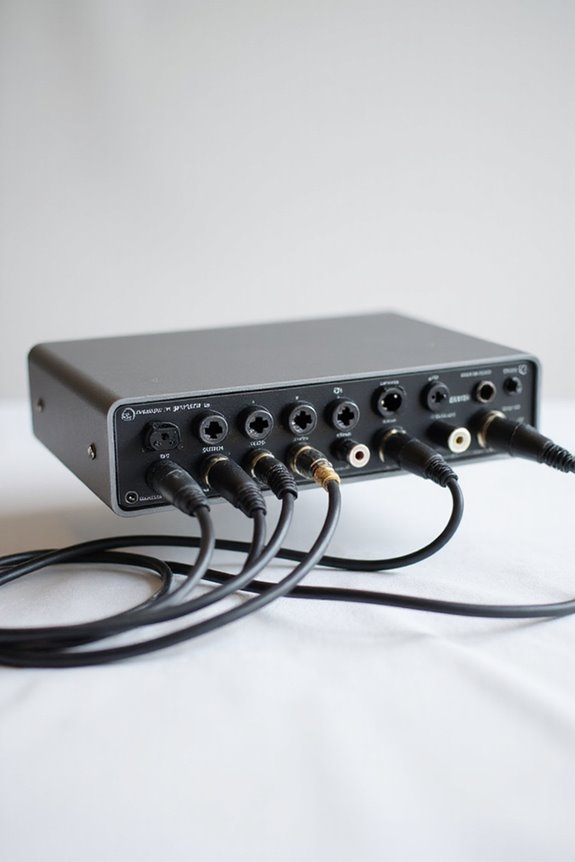
Connecting Line Level Devices
Connecting Line Level Devices
Line level devices play a crucial role in our audio setup, providing a sturdy and reliable signal for recording and mixing! 🎹 Whether you’re connecting a keyboard, synthesizer, or an effects unit, these devices output audio at a standard voltage that matches perfectly with audio interface inputs.
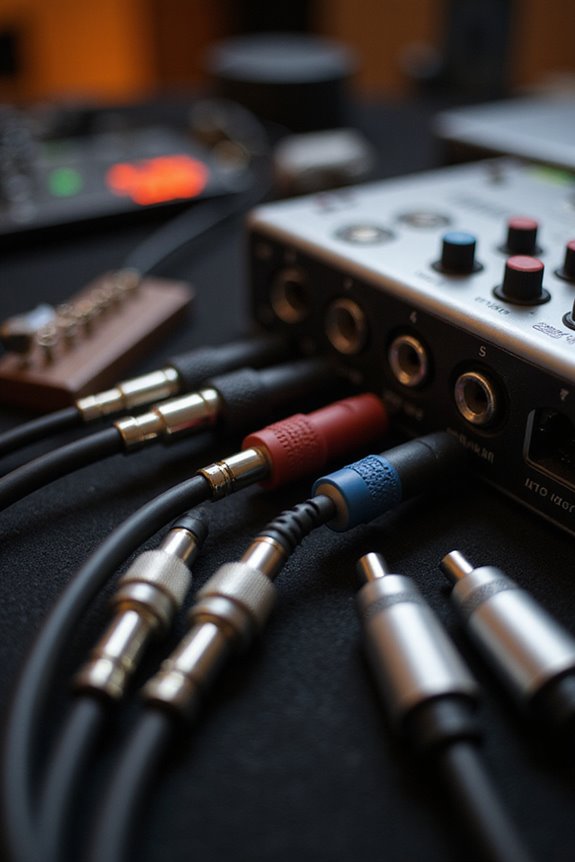
To connect them, we’ll use 1/4-inch TRS cables for balanced signals, which reduce noise and interference. If we need to connect unbalanced devices, TS cables work but can be noisy—especially over longer distances. Make sure we correctly plug the outputs into the line inputs of our interface, setting any combo jacks to “line” mode. Let’s adjust the gain slowly to maintain clean levels and avoid clipping, keeping our sound smooth and professional! Additionally, ensure that your audio interface offers input/output options to accommodate various devices effectively.
Recommended Products
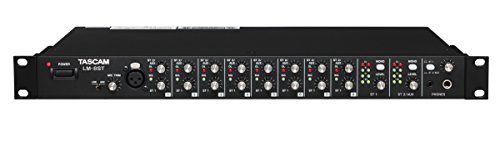
A 1-space rackmountable line mixer for installation, studio submixing, keyboardists or anyone looking for a great-sounding mix

Package Includes: (2) Mackie Thrash212 12" 1300W Powered Active DJ PA Speaker Thrash 212. (1) Rockville BT-LINK Pair of Aux to Bluetooth Adapters To Link 2 Speakers Together. Features: 1300W ultra-efficient Class-D amplifier. Built-Like-A-Tank to conquer every gig while lightweight for easy loading. Frequency response: 52Hz - 20kHz (-10dB). Max SPL: 125 dB. Flexible I/O

Convenient, Versatile - Compact 3U rackmount mixer with easy-access front panel inputs perfect for smaller clubs and venues, houses of worship, as well as mobile/traveling systems
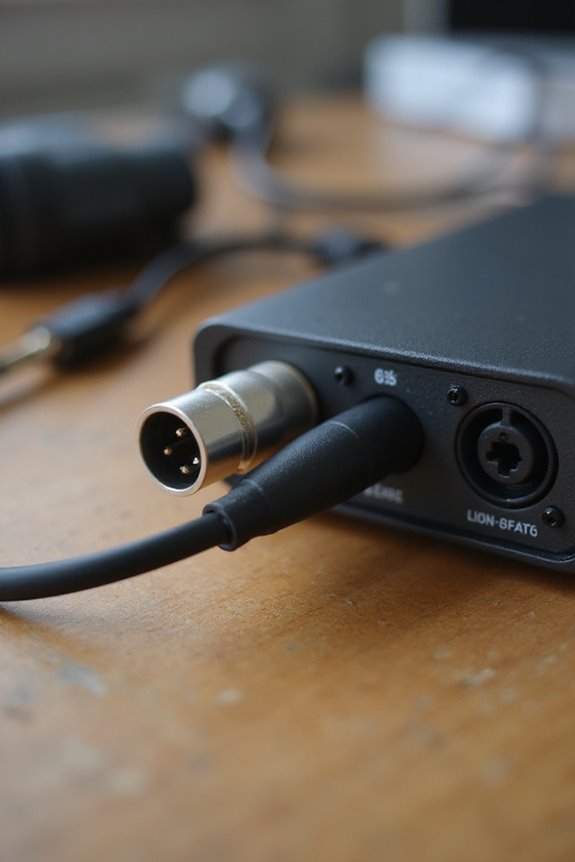
Interface-to-Computer Connection
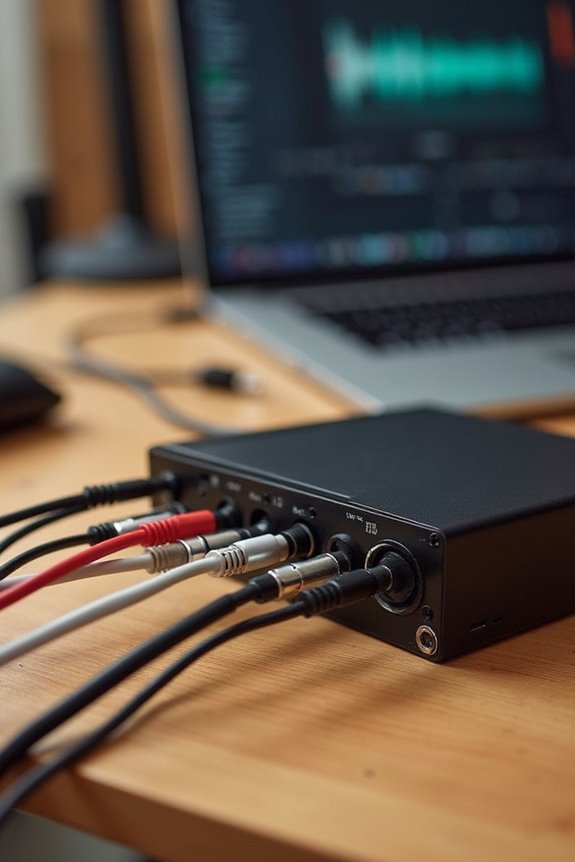
When we think about connecting our audio interface to a computer, it can feel a bit challenging at first. But don’t worry—we’ve got this! USB compatibility is a breeze for most, while Thunderbolt advantages include lower latency and faster transfers—perfect for pros! As FireWire declines in popularity, we find that the right interface selection is critical.
Keep in mind that driver installation may be needed, especially for Windows. Let’s not forget about cable length; too long, and we risk signal degradation. Power considerations are key, with USB interfaces often being bus-powered. We should also monitor latency through our DAW for smooth performance. Additionally, choosing an interface that supports multiple ADAT inputs can greatly enhance your recording capacity. Finally, firmware updates may pop up to enhance compatibility. Let’s connect and create magic!
Best Practices for Connecting Instruments
Connecting instruments to an audio interface can be a thrilling part of music creation! 🎶 Whether you’re jamming on an electric guitar or playing a synth, choosing the right cables and inputs is essential for capturing that perfect sound.
For instrument input optimization, use 1/4-inch TS cables for guitars and keyboards, connecting them to dedicated high-impedance inputs—those handy inputs usually marked with a guitar symbol! It’s all about getting that sweet signal without distortion.
Don’t forget direct monitoring techniques; if you’re facing latency, be sure to utilize the direct monitoring feature on your interface. Adjust the gain to avoid clipping—keeping it around -6 dB to -12 dB is like giving your sound the perfect amount of headroom! Additionally, ensure your interface has ASIO-optimized drivers for reduced latency and improved performance. Let’s rock those connections!
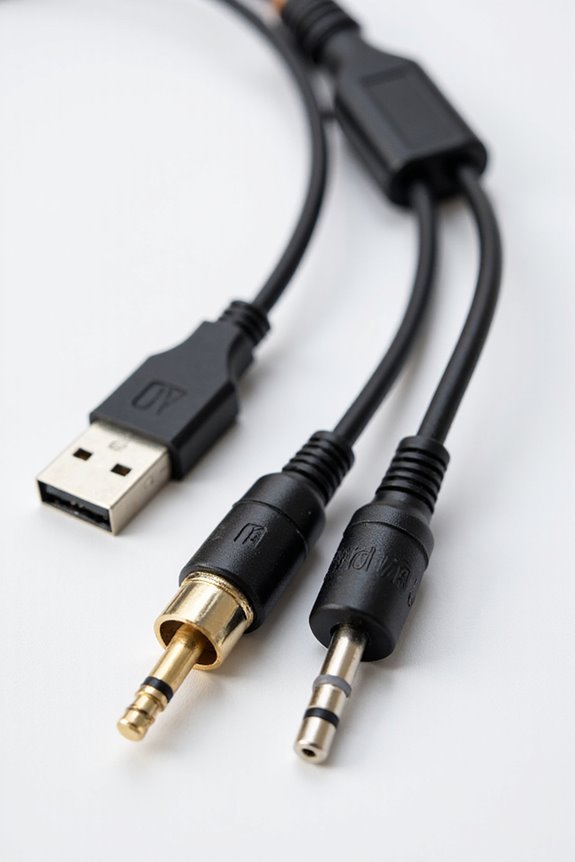
Importance of Cable Quality and Type
While it may seem like just a collection of wires and connectors, the quality and type of cables we use can profoundly affect our sound! 🎤 We all want our music to shine, right?
Recommended Products

Runs on 110V power with 6A, 60HZ, and 24" x 24" cutting area (3/4" mild steel capacity)

The motion control synthesis engine unifies and controls two iconic sound engines: AWM2 (high-quality waveform and synthesis) and fm-x (modern, pure frequency modulation synthesis. )

This chain is made with real 14k yellow solid gold and is stamped with the appropriate 14k metal stamp
Cable Construction Matters
High-quality instrument cables feature layered shielding, reducing unwanted interference. Think about using oxygen-free copper—better conductivity and durability, even though it costs a bit more.
Connector Durability
Gold-plated connectors resist corrosion, ensuring reliable signal pathways. Trust us—it pays off in the long run!
Signal Integrity
Consider cable length, too. Shorter cables help maintain signal integrity while longer ones risk tonal loss. Remember, when it comes to our instruments, quality cables are more than just an accessory; they’re an essential part of our musical journey. Let’s connect with excellence! 🎶
Configuring Gain Levels and Phantom Power
Once we’ve sorted out our cables, it’s time to focus on configuring gain levels and phantom power for our recordings! 🎚 Getting these settings right is just as important, as they can make or break the sound quality. Start with gain staging: adjust your instrument’s output, like the guitar knob, to keep your interface gain lower and reduce noise. Aim for input levels peaking around -10 dBFS.
For high-impedance instruments, use the Hi-Z input to preserve signal integrity. When using condenser mics, activate phantom power carefully. Remember, only use it with compatible mics! Watch those LED meters; green means go, while red signals potential clipping. Let’s guarantee our audio shines! 🌟
Recommended Products

Portable PA System - Balance power and portability with the L1 Pro system optimized for both on-the-go simplicity and expanded bandwidth, ideal for small-to-medium sized clubs, bars, and other venues

Portable PA System - Get in, set up, and simply perform with the most portable L1 Pro system, ideal for small venues like coffee shops and cafes

Requires +48V Phantom Power: Compatible with standard studio equipment, ensuring seamless integration into any recording setup.
Troubleshooting Common Connection Issues
Have you ever wondered why your audio interface sometimes refuses to cooperate? 🤔 Troubleshooting common connection issues can seem challenging, but it’s often about checking a few key factors.
First, let’s verify we have sufficient USB power. If you’re using a hub, try connecting directly to a dedicated port. Next, keep an eye on those cables—low-quality ones can create pesky dropouts! We should also consider driver issues; outdated or corrupt drivers can lead to glitches.
Lastly, checking for resource conflicts is essential. Too many devices on one USB bus can hinder our connection stability.
With these troubleshooting techniques, we can tackle most common issues and keep our audio jam sessions flowing smoothly! 🎶
Keeping Your Workspace Organized
After tackling those frustrating connection issues, getting your space organized can truly enhance our music-making experience! With some thoughtful workspace organization, we can easily zone our areas for practice, recording, and producing. This means clear spots for instruments, gear, and even a dedicated storage area for sheet music!
Let’s not forget our decluttering strategies. By removing non-essential items, we keep distractions at bay and improve acoustics. Investing in labeled storage units for cables or pedals saves us time, while cable management practices like coiling and labeling keep things tidy.
When our workspace feels professional and accessible, we’re more likely to stay inspired. So, let’s put these tips into practice and streamline our creative journey together! 🎶
Frequently Asked Questions
Can I Use Multiple Instruments Simultaneously With One Audio Interface?
When it comes to a multi instrument setup, we’ve got to face audio interface limitations. While some interfaces allow multiple connections, often we need to strategize or use software to get it all together.
What Should I Do if My Instrument Isn’t Recognized by the Interface?
If our instrument isn’t recognized, let’s start with some instrument troubleshooting. We should check the interface’s compatibility, guarantee cables are high-quality, and verify that all necessary drivers and software are installed and updated.
Are There Specific Cable Brands Recommended for Audio Connections?
When we think of connecting our audio journey, choosing the right cable is like picking the right brush for a masterpiece. Brands like Mogami, Canare, and Planet Waves stand out among various cable types, enhancing our sound together.
How Can I Test if My Connections Are Secure?
When we troubleshoot connections, we can improve our secure cable testing by ensuring everything’s firmly seated, checking for visible damage, and listening closely for any distortion, making our sound experience better together.
Is There a Limit to the Number of Audio Inputs on an Interface?
When it comes to audio channel limits, we’ve got to take into account interface input types. There’s definitely a cap, but planning ahead guarantees we won’t be caught short when it matters most. Let’s make it work!