To connect instruments to an audio interface, we start by understanding our setup! 🎸 Use 1/4-inch TS cables for electric guitars and XLR cables for mics. Make sure to check preamp quality for clearer sound! Set gain levels to avoid peaking in the red (between -12 to -14 dBFS is perfect). Connect keyboards via line-level outputs and use MIDI for digital instruments. Keep those cables tidy and short for the best sound. Excited for more tips? Let’s keep going!
Key Takeaways
- Use 1/4-inch TS cables for electric guitars, connecting to the dedicated instrument input on the audio interface.
- Employ XLR cables for microphones; dynamic mics don’t require phantom power, but condensers do.
- Connect keyboards via line-level outputs to line inputs on the audio interface for optimal sound quality.
- Ensure proper gain settings, aiming for peaks between -12 to -14 dBFS to avoid digital clipping during recording.
- Keep cables organized and short to minimize interference and signal degradation for a clean audio signal.
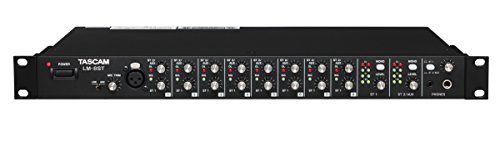
Understanding Your Audio Interface
You may be interested
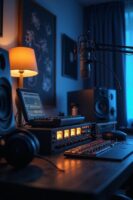
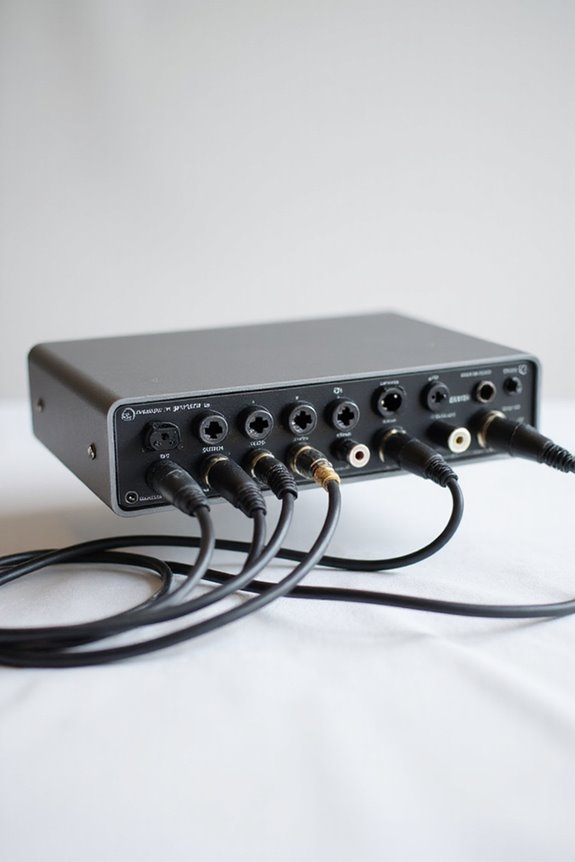
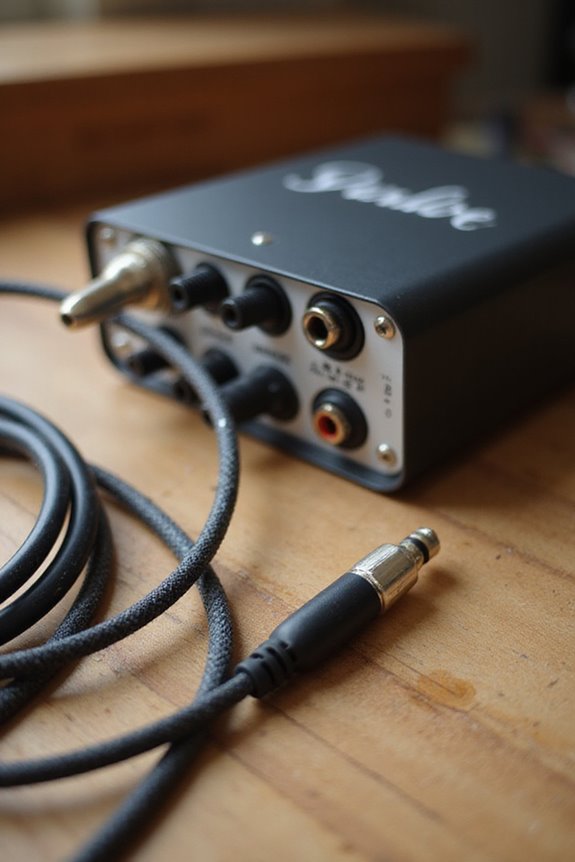
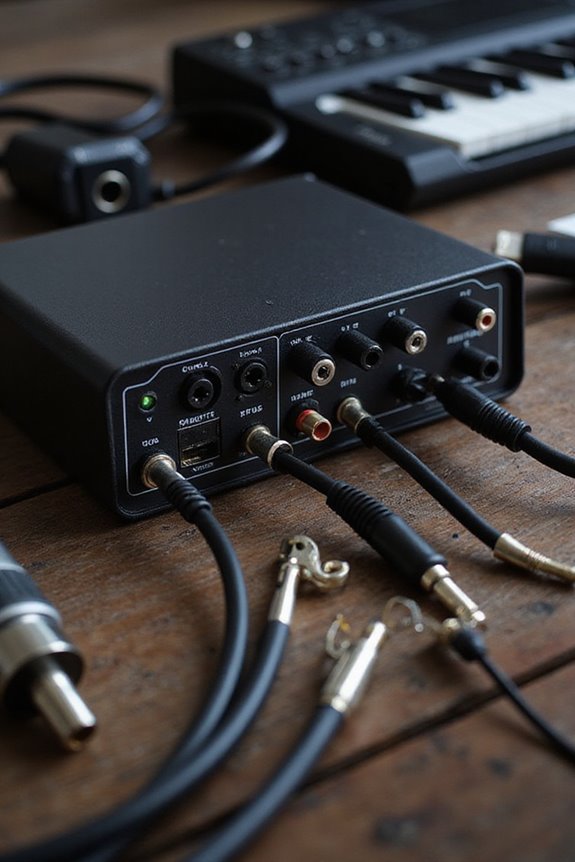
When we’re diving into the world of audio interfaces, it’s essential to understand what goes on behind the scenes! 🎤 An audio interface acts as the bridge between your instruments and your computer, converting analog signals into digital data.
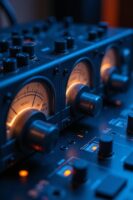
There are different interface types, usually categorized by connection options like USB or FireWire. We’ll want to pay attention to preamp quality too, since it can greatly affect our recordings. A good preamp provides ideal gain, ensuring our sound is clear and free from noise. Ultra-low latency is crucial for seamless live recording experiences, which can significantly enhance your overall sound quality.
With inputs for XLR mics and 1/4” instruments, we have plenty of flexibility! Let’s remember to take into account our needs for headphone outputs and monitor connections as we set everything up. Together, we’ll make our recordings shine!
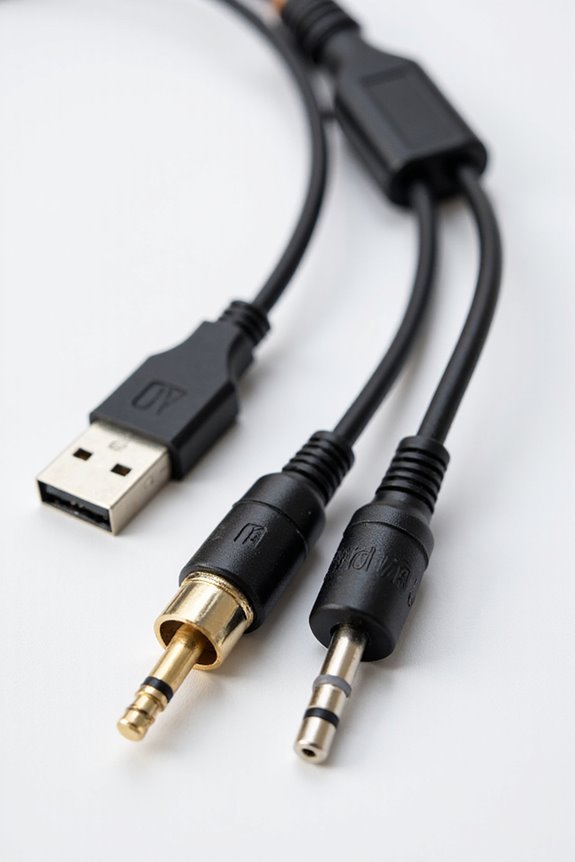
Choosing the Right Cables
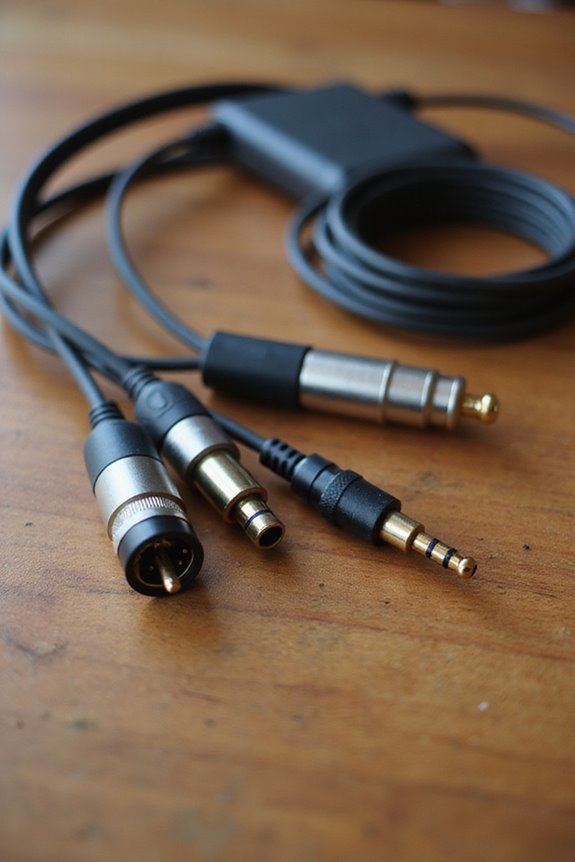
Choosing the right cables for your setup is as important as selecting the instruments themselves! 🎸 Each type of cable serves a specific purpose, and knowing which one to use can make or break your recording experience.
First, let’s talk cable types. For electric guitars, we need 1/4-inch TS cables. XLR cables work wonders for microphones, while MIDI cables connect your keyboards. USB cables are becoming our best friends, replacing multiple analog cables!
Now, let’s consider cable quality! Look for good shielding, as it minimizes interference. Gold connectors can guarantee better longevity. Remember, shorter unbalanced cables (like TS or RCA) reduce signal degradation. So, when choosing cables, let’s combine the right types with the best quality for our perfect sound! 🎶 Additionally, ensure that your cables are compatible with phantom power support to achieve optimal mic performance during recordings.
Recommended Products

120-Watt bi-amp acoustic combo amplifier with harmony function to create smooth vocal harmonies (Boss Acoustic Singer Pro)

Product 1: Warm and rich analog soundsCrytal clear digital timbresVocoder and effectsEasy programming

Bring Your Sound to Life - Expand the sonic possibilities in your studio with the powerful semi-modular analog spectral processor that creates lively drones and colorful tonal sweeps on its own
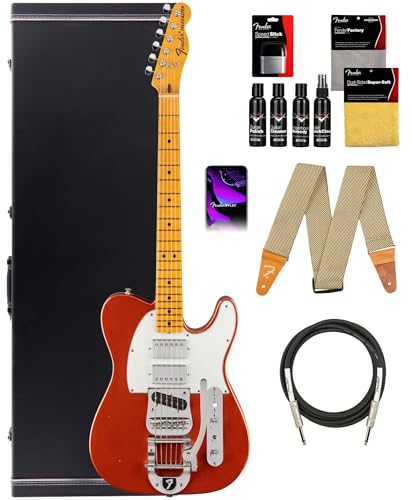
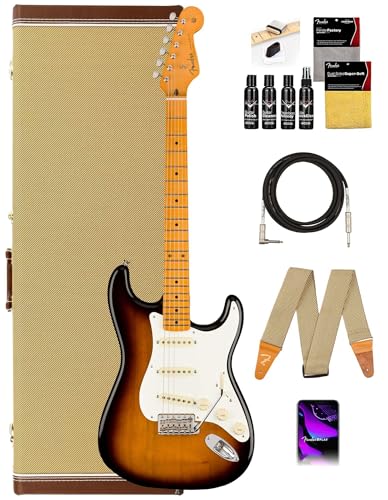
Connecting Electric Guitars
Connecting electric guitars to your audio interface can be a game-changer for your recordings! 🎸 To kick things off, let’s guarantee we have the setup just right. Start by connecting the interface to your computer and ensuring it recognizes it in the sound settings.
Next, plug your guitar’s output jack into Input 1 on the interface, using a dedicated instrument input. This is essential for handling various guitar pickup types effectively, from single coils to humbuckers. Now, let’s set the gain—don’t be shy, but avoid going into the red! Remember to enable input monitoring in your DAW to explore amazing electric guitar effects. And hey, keep those cables short to maintain crisp sound. Additionally, utilizing a pad switch can help prevent distortion from high levels during your recordings, ensuring overall sound quality remains pristine. Let’s rock on!
Recommended Products

EVERY TOUCH AND DYNAMIC REGISTERS WITH NATURAL PRECISION: Triple sensor keybed and grand weighted action detect every nuance for natural, expressive response across all 88 keys
HEIRLOOM NITRO FINISH & HARDWARE: The Fender Red Dog Telecaster features an Heirloom nitrocellulose lacquer finish and aged hardware, delivering a vintage look and a naturally resonant tone that evolves beautifully over time
DISTINCTIVE SASSAFRAS BODY: Crafted from a rare two-piece sassafras wood, this guitar boasts a fine-grained appearance and delivers a silky tone with a focused midrange, perfect for a unique sound experience.
Hooking Up Other Instruments
Hooking up other instruments to your audio interface can open up a whole new world of creativity! 🎶 Whether we’re adding keyboards, microphones, or drum machines to our setup, it’s essential to connect these devices properly for the best sound quality.
Microphones use XLR cables with mic-level inputs—remember, dynamic mics don’t need phantom power, but condenser mics do! For keyboards, line-level outputs should go into line inputs, and let’s not forget those MIDI devices that plug directly into the interface. When using drum machines, connect them via line-level signals, adjusting gain levels carefully to capture those tight beats. By understanding these connections, we can elevate our sound and enjoy the jam session together! 🎵 Additionally, ensuring that your interface supports high-quality audio formats can significantly enhance your recording experience.
Recommended Products

DIGIC X PROCESSOR WITH 8K VIDEO: Offers outstanding definition and realism with 16x the resolution of FHD video and an ISO range of 100-51200 (expandable to 102400) for crisp and vibrant photos and movie-theater-quality videos at up to 8K/60P

For Recording Studios and Touring

DuoPre XLR Microphone preamps, including 48V Phantom power for condenser microphones and up to 69dB of gain. Each preamp uses two gain stages to provide a full and accurate sound across the entire gain range with enough power for even the most gain hungry mics.
Setting Input Modes for Instruments
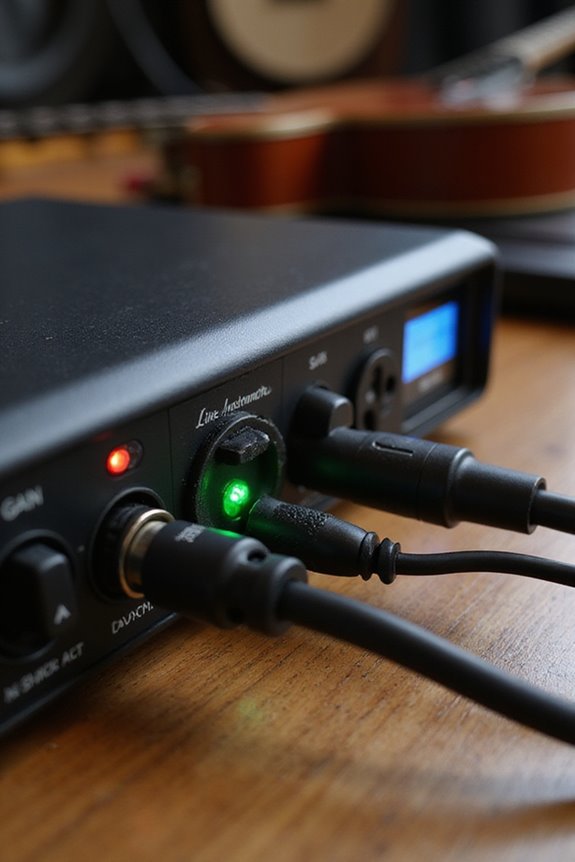
When it comes to getting your instruments sounding their best, selecting the right input mode on your audio interface can make all the difference! 🎸 Each mode is designed for specific types of signals, ensuring we capture the sound accurately. For electric guitars and basses, we should use the Hi-Z connections to maintain tone integrity and proper impedance matching. Don’t forget to toggle the Hi-Z or Instrument input mode switch, if available! Connecting to line inputs without switching can degrade our sound. If we’re using mics, stick to mic inputs unless we have a DI box—trust us, it’ll save us from gain issues later! Let’s make sure we configure our setup right for optimum sound quality! Additionally, using interfaces with high-quality preamps can significantly enhance the clarity of your recordings.
Proper Gain Staging Techniques
Setting the right gain staging is essential for capturing great sound! 🎶 Proper gain management helps guarantee that our recordings are clean and professional. To achieve this, let’s aim for input gain levels where the loudest parts peak between -12 to -14 dBFS. We’ve got to avoid exceeding -10 dBFS—no digital clipping here! Additionally, using audio interfaces with low latency under 10 ms ensures seamless recording and monitoring.
Connecting Line Level Devices
Connecting line level devices is a critical step in guaranteeing your audio interface delivers great sound! 🎧 You’ll typically use devices like keyboards, mixers, and effect processors, which output signals at a stronger voltage than instruments or microphones.
To keep our signal integrity intact, let’s opt for quality cables. We recommend using 1/4-inch TRS cables for balanced connections—these minimize interference and perform beautifully over longer runs. If your device has an XLR output, grab an XLR to TRS cable to make that connection work.
Don’t forget to set your audio interface input to “line” mode! This helps in achieving the right gain and prevents distortion. Let’s guarantee everything’s set up properly to enjoy crisp, clean audio!
Recommended Products
A 1-space rackmountable line mixer for installation, studio submixing, keyboardists or anyone looking for a great-sounding mix

12 discrete channels (8 mono plus 2 stereo) with XLR or 1/4-inch connectivity

Package Includes: (2) Mackie Thrash212 12" 1300W Powered Active DJ PA Speaker Thrash 212. (1) Rockville BT-LINK Pair of Aux to Bluetooth Adapters To Link 2 Speakers Together. Features: 1300W ultra-efficient Class-D amplifier. Built-Like-A-Tank to conquer every gig while lightweight for easy loading. Frequency response: 52Hz - 20kHz (-10dB). Max SPL: 125 dB. Flexible I/O
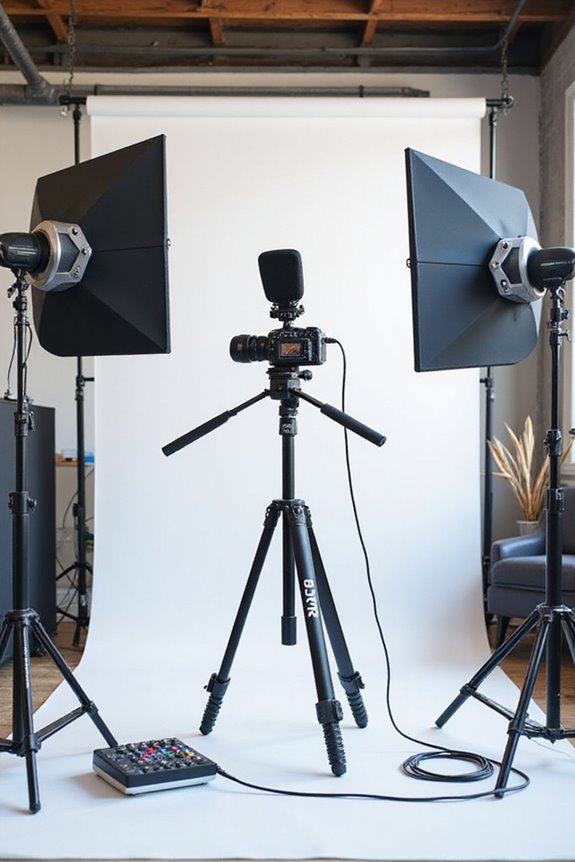
Monitoring Your Setup
To guarantee our audio setup shines, we can’t underestimate the importance of monitoring! 🎚 Proper monitoring allows us to hear every detail, making it essential for achieving professional-sounding recordings.
First, let’s keep our monitoring levels in check. Always set our interface output volume to zero before powering on the monitors, preventing any surprises! When we need personal monitoring, we can use the dedicated headphone output without altering the main mix.
For latency management, enabling direct monitoring lets us hear input signals almost instantly, avoiding pesky delays. We should also turn off input monitoring in our DAW to dodge echo issues.
Lastly, always use balanced cables for clean sound and adjust our gain gradually—it’s key to our audio success! 🎶
Troubleshooting Common Issues
We’ve covered the importance of monitoring our audio setup, but sometimes things don’t go as planned! 🎶 Troubleshooting common issues with our audio interfaces can feel like chasing shadows, but with a little guidance, we can quickly pinpoint and fix those pesky problems.
First, let’s tackle power issues. If your interface isn’t powering on, try connecting it directly to your computer’s USB port instead of a hub; unpowered hubs are often the culprits. For software conflicts, keep your drivers updated from the manufacturer’s site. Restarting your computer or testing different USB ports can help too. If you’re facing audio dropouts, it might be due to buffer settings or pesky background processes. Let’s keep our music flowing smoothly!
Recommended Products
Outstanding 4K Visuals, Mapped Perfectly to Your Space: X1 Pro's Triple Laser engine delivers 3,500 ANSI lumens, 1.07 billion colors, and 56,000:1 dynamic contrast; SpaceFlow auto-maps your wall's exact 3D shape and texture — fitted precisely to any surface for a truly cinematic image.

Ultra High Definition 4K (3840x2160) FOUR TIMES the resolution of 1080P! 32 Channel 6K 12MP NVR 4K Security Camera System with (32) H.265+ 4K (8MP) @20FPS Weatherproof 2.8mm Wide Angle PoE IP Dome Cameras (Built-in Microphone)

Ultra High Definition 4K (3840x2160)FOUR TIMES the resolution of 1080P! 32 Channel 6K 12MP NVR with (32) H.265+ 4K (8MP) @20FPS Weatherproof 2.8mm Wide Angle Microphone Audio & Video PoE IP Bullet Cameras
Tips for Optimal Sound Quality
When it comes to capturing high-quality sound, a few essential tips can make all the difference! 🎤 First, let’s consider input types and cable selection. Use 1/4-inch TS cables for instruments and XLR for mics. This helps maintain sound integrity.
We can also enhance our setup with soundproofing techniques: acoustically treated spaces minimize background noise, allowing our music to shine through!
Cable management matters, too! Keeping cables organized reduces interference, leading to cleaner sound.
Next, remember to properly adjust gain levels, monitoring for clipping. And don’t forget to use balanced cables for outputs; they help reduce noise. Let’s work on these tips to improve our sound quality together and create recordings we’re proud of! 🎶
Frequently Asked Questions
Can I Connect Multiple Instruments Simultaneously to an Audio Interface?
In our quest to make music, we can connect multiple instruments simultaneously to an audio interface. Although we may face audio interface limitations, careful setup guarantees every instrument shines in our harmonized creations together.
How Do I Choose Between Dynamic and Condenser Microphones?
When choosing between microphone types, we should consider sound quality and our recording environment. Dynamic mics are great for live situations, while condensers excel in studios where detail and nuance matter. Let’s make the right choice together!
Will Connecting an Instrument Damage My Audio Interface?
Will connecting an instrument damage our audio interface? Generally, it won’t, but we should prioritize instrument safety and utilize the interface protection features. Proper connections help us avoid potential issues and keep our gear safe together.
What Features Should I Look for in a Good Audio Interface?
When choosing a good audio interface, we should prioritize input/output options and guarantee preamp quality is excellent. That way, we’re all set for clean recordings and seamless connections, making our creative projects shine together.
How Can I Reduce Latency When Recording Instruments?
To enhance our sonic experience, we can fine-tune buffer size and explore various monitoring options. By doing so, we’ll considerably reduce latency during recording, ensuring our musical expressions resonate with clarity and precision.